So, you’ve got a cone of Lawsonia inermis—that’s just the science name for henna—and you're staring at your palm. It’s intimidating. You see these Instagram artists whipping out architectural mandalas that look like they belong on a cathedral ceiling, and suddenly, "easy" feels like a lie. Honestly, most people overcomplicate it. They try to draw the whole garden at once.
Henna isn't about being a master illustrator right out of the gate. It is about muscle memory and understanding how the paste flows. If you can doodle a circle on a napkin while you're on a boring phone call, you can master easy henna flower designs. The secret? It’s all in the "blob and pull" method.
We’re going to talk about why your flowers look wonky, how to fix your hand positioning, and which specific petals are basically foolproof for beginners. No fluff. Just the stuff that actually makes the stain look dark and the lines look crisp.
Why Your First Easy Henna Flower Designs Usually Fail
Most beginners make the same mistake: they squeeze the cone too hard. If you’ve ever tried to write with a ketchup bottle, you know the struggle. When you're working on easy henna flower designs, the pressure should be consistent, like squeezing a tube of toothpaste—not a grip of death.
Another huge issue is the "dragging" habit. People try to draw with the tip of the cone touching the skin. Don't do that. You want to "drape" the line. Lift the tip slightly off the skin, let the string of paste fall into place, and then lay it down. It’s like piping frosting on a cupcake. If you drag the metal or plastic tip through the paste, you get those jagged, shaky lines that make the flower look like it’s vibrating.
Also, let's be real about the paste. If you bought a "shelf-stable" cone from a random grocery store that smells like gasoline or chemicals, stop. Those often contain PPD (para-phenylenediamine), which can cause nasty chemical burns. Real henna should smell like eucalyptus, lavender, or tea tree oil. It should be greenish-brown, not jet black. If the paste is bad, the design doesn't matter because the stain will be patchy or, worse, dangerous.
The Five-Petal Classic (With a Twist)
The five-petal flower is the bread and butter of Mehndi. But instead of trying to draw perfect arcs, try the "dot-to-petal" technique. Start with a thick dot in the center. Then, place five smaller dots around it in a circle. Use a toothpick or the very tip of your cone to gently drag the outer dots toward the center one.
Boom. You have a stylized, organic flower.
It looks intentional. It looks "boho." It’s much easier than trying to freehand symmetrical loops. If you want to get fancy, you can add "shading." This is where you take a tiny bit of paste and smear it from the outer edge of the petal toward the center. It creates a gradient effect once the stain develops. Professional artists like Neha Assar or the creators at Henna Lounge often use this layering to create depth that makes a simple design look three-dimensional.
The Swirl-Based Rose
Roses sound hard. They aren't. Not in henna, anyway. To make an easy henna flower design that looks like a rose, you start with a "comma." Draw a small swirl (a "6" shape) in the center. Then, wrap "C" shapes around it.
- Make the first "C" tight.
- Make the next one a bit looser.
- Overlap them slightly.
The trick here is thickness. Use a thicker line for the outer petals and a very thin line for the inner swirl. This contrast is what makes the flower "pop" against the skin. If every line is the same width, the design looks flat and muddy.
Mastering the "Gulf" Style Bold Floral
If you have shaky hands, the Gulf (Khaleeji) style is your best friend. Unlike the intricate, lace-like patterns of Indian Mehndi, Gulf designs use bold, thick lines and lots of negative space.
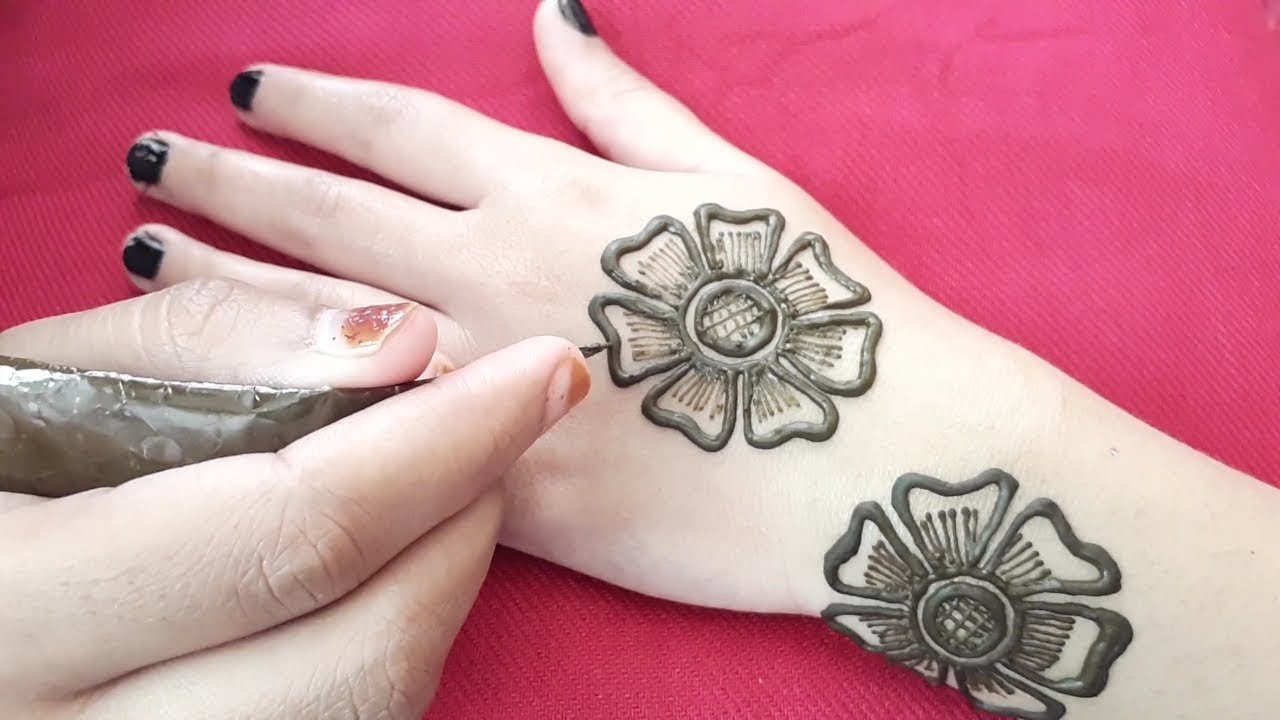
You aren't drawing tiny details here. You're drawing big, chunky petals. Think of a hibiscus. Big, floppy, and bold. You fill in the petals entirely with paste. This is great for beginners because if you mess up a line, you just fill the whole petal in anyway! No one will ever know there was a wobble underneath that mountain of henna.
When you peel the dried paste off—usually after about 6 to 8 hours—those filled-in areas will be a deep, rich mahogany. The contrast between the dark stained "blobs" and the bare skin is stunning. It’s high impact for very low effort.
The Science of the Stain: Making It Last
You spent forty minutes hunched over your coffee table. Now what? If you don't take care of the paste, your easy henna flower designs will fade in two days.
The dye in henna is called lawsone. It needs heat and moisture to migrate from the plant matter into your top layer of skin (the epidermis).
- Seal it: Mix some lemon juice and sugar into a sticky syrup. Dab it onto the dried henna with a cotton ball. This keeps the paste stuck to your skin so it doesn't flake off while you're sleeping.
- Heat is your friend: Wrap the area in medical tape or just stay near a heater. The warmer your skin, the darker the stain.
- No water: This is the hard part. Don't let water touch the design for the first 24 hours after you scrape the paste off. If you have to shower, coat the design in coconut oil or olive oil to create a waterproof barrier.
Did you know that henna stains darkest on the palms and soles of the feet? It's because the skin is thicker there. If you put a flower on your forearm, it will be lighter. If you put it on your palm, it might turn almost black-burgundy. Keep that in mind when choosing your "canvas."
Fixing Mistakes Without Panicking
You’re halfway through a petal and your hand slips. Now there’s a giant smear of green mud on your wrist. Relax.
Keep a box of Q-tips and some rubbing alcohol nearby. If you catch a mistake immediately, you can wipe it away without leaving a trace. If it has already started to "tint" the skin, you have to get creative. This is where "filler" comes in. Turn that accidental smear into a leaf. Add some "dots" (called butis) around it to make the mistake look like a deliberate part of a vine.
In the world of henna, there are no mistakes, only "additional flourishes."
Mandala-Style Flowers for Symmetry
If you want that circular, balanced look, use a "guide." You can take a small bottle cap and lightly press it into your skin to leave a faint circular indentation. Use that as your perimeter.
Draw your flower inside that circle. This keeps your petals from "growing" lopsided as you move around the design. Professional artists often use "tension points"—they rest the side of their hand on the table or the client's arm to stabilize their fingers. If your hand is floating in the air, you’re going to wobble. Anchor yourself.
Common Myths About Henna
There’s a lot of misinformation out there. People say you should use "Black Henna." Don't. It's not henna. It's chemicals. Real henna is never black.
Some people think you should wash the paste off with soap. No! Scrape it off with a butter knife or your fingernail. Using soap and water immediately after removing the paste stops the oxidation process. The stain starts orange and turns reddish-brown over 48 hours. If you hit it with Dial soap at hour one, you're stuck with "Cheeto orange" flowers.
Another weird tip: some people swear by putting Vicks VapoRub on the stain after removing the paste. The menthol creates heat, which can help darken the stain, but a good quality essential oil in the paste is usually enough.
Practical Steps to Start Right Now
Don't go straight for your hand. Practice on a piece of glass or a plastic sheet placed over a printed template.
- Print out a basic flower outline.
- Tape a piece of plexiglass or a heavy-duty sheet protector over it.
- Trace the design with your henna cone.
- Scrape it off, wipe the surface, and do it again.
Once you can trace a flower five times without your hand cramping, move to your skin. Start with the "non-dominant" hand first, or better yet, practice on your thigh where you have a large, flat surface and both hands free to steady the cone.
Focus on the "tear-drop" shape. If you can make a tear-drop, you can make a leaf, a petal, and a peacock feather. It is the fundamental building block of almost every easy henna flower designs you’ll ever see. Squeeze hard at the top, then pull away and release the pressure to create the point.
Master that one motion. Everything else is just a variation of the squeeze and pull. Get some high-quality, organic paste, find a comfortable chair with good lighting, and stop worrying about perfection. The beauty of henna is that it's temporary. If you hate it, it'll be gone in ten days, and you can try again with a better "squeeze."